Caulk after your primer coat but before your first finish coat. That’s the sequence professional painters follow for almost every interior trim, baseboard, crown molding, and exterior siding gap. Priming first lets caulk bond to a sealed, dust-free substrate. Painting over the cured caulk locks it in and erases the visible seam. Caulking only after the finish coat is for touch-ups, not new work.
The universal pro sequence (and why “before vs after” misses the point)
The internet’s most-cited answer is “caulk before painting.” That’s directionally right and practically wrong. The real pro sequence has three phases, and caulk lives in the middle.
- Scrape, sand, clean, and patch any drywall or wood substrate.
- Prime every porous surface (raw wood trim, bare drywall, stucco patches, weathered siding).
- Caulk every joint and crack with a paintable sealant rated for the substrate.
- Apply the first finish coat. Inspect.
- Apply the second finish coat.
Why prime before you caulk? Two reasons. Paintable acrylic latex caulk bonds dramatically better to a primed surface than to dusty, porous, or chalky substrate. The Sherwin-Williams caulk spec sheets call for clean, dry, sound surfaces. Primer creates exactly that. The second reason is visual: priming exposes every gap, nail hole, and hairline crack that’s invisible on raw drywall or weathered siding. You can’t caulk what you can’t see.
Caulking only after the finish coats is a different operation. It’s for fixing shadow lines you missed, or for repainted rooms where new settling cracks opened along trim. In that case, you cut in a thin paintable bead, tool it flat, and either touch-paint just the caulk line or repaint the whole section. Never leave bare caulk visible on a finished wall - even paintable caulk yellows, attracts dust, and reads as a different sheen than the surrounding paint.
The “caulk before painting” answer floating around the rest of the internet skips the priming step entirely. That’s why DIY caulk lines crack within a year. The bead never bonded to a stable substrate.
Baseboards: prime, caulk, then paint
Baseboards are the highest-traffic caulking job in any house, and they’re where the bad advice causes the most damage. Here’s the SD-tested sequence.
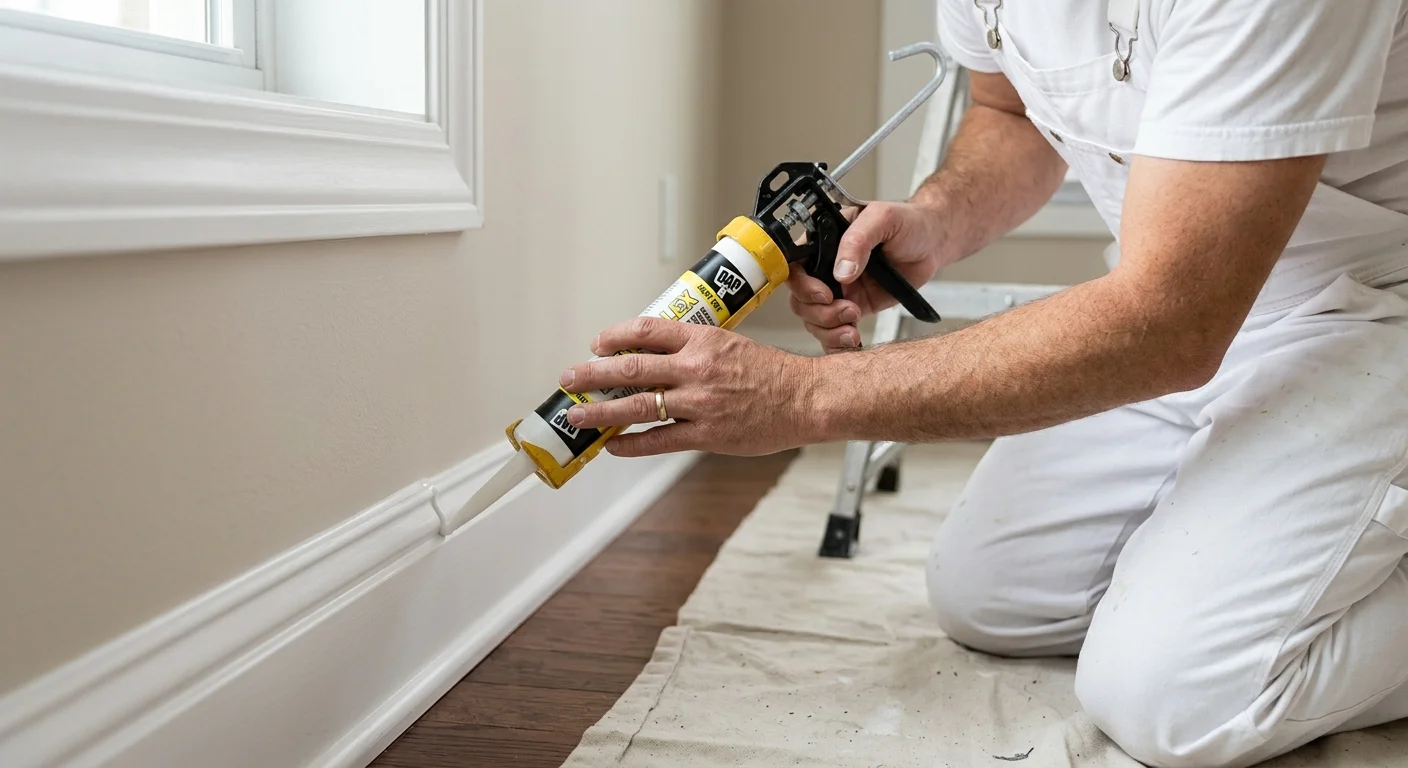
After installing new MDF or pine baseboards, nail-set and fill every nail hole with lightweight spackle. Sand flush. Wipe down with a tack cloth. Prime the entire baseboard plus the bottom inch of wall with an oil or shellac-based primer if you’re using MDF (water-based primer swells MDF edges). Once dry, run a continuous bead of paintable siliconized acrylic caulk along the top of the baseboard where it meets the wall, and along any inside corners where two pieces of baseboard butt together. Tool the bead immediately with a damp finger or a 1.5-inch caulk tool. Let it skin for 30 minutes minimum (most paintable caulks list 30-60 minute paint-ready times - check the tube).
Apply your finish coat. Two coats of a satin or semi-gloss trim paint is standard in SD County. For deeper detail on the baseboard-specific case and the shadow-line problem, our why caulk baseboards before painting guide walks the whole process step by step.
The mistake to avoid: caulking unprimed MDF baseboards. The caulk wicks moisture into the raw fiberboard, the edge swells slightly, and within six months the seam telegraphs through your finish coat as a faint ridge.
Trim and crown molding: same sequence, tighter tolerances
Door casings, window trim, and crown molding follow the same prime-caulk-paint order, but the tolerances are tighter because the joints are at eye level. A sloppy bead on a baseboard hides behind furniture. A sloppy bead on crown molding stares down at every guest.
Cut your bead small. A pencil-thin line is plenty for any joint under 1/8 inch. For wider gaps, run a backer rod (round foam cord) into the cavity first so the caulk has something to compress against - this is standard for crown molding joints in older San Diego homes where the ceiling has settled. Without backer rod, deep caulk beads crack along the centerline as they cure.
Inside corners on crown get caulked. Outside corners almost never do - they get coped or mitered, and any visible joint is so structural that caulk just delays the inevitable separation. If you’re seeing gaps at outside crown corners, that’s a carpentry problem, not a caulking problem.
Our trim and baseboard painting guide for San Diego covers the cut-in technique and the right brushes for these tight joints.
Windows: do you caulk windows before or after painting?
Windows split into two jobs, and they don’t share a rule. Interior window trim follows the standard order: prime, caulk the casing-to-wall and casing-to-jamb joints, then finish coat. Exterior window perimeters are where people get it wrong.
On the exterior, caulk the window perimeter before the finish coat so the paint covers and seals the bead. The joint that matters most is where the window frame meets the stucco or siding. Run a continuous bead there, tool it flat, and let it skin before painting. For gaps wider than 1/4 inch around an older window, pack backer rod in first so the caulk has something to compress against and won’t crack down the middle.
San Diego adds two wrinkles. Coastal windows (La Jolla, Pacific Beach, Encinitas, Carlsbad, Oceanside) take a daily marine-layer humidity swing that chews through cheap acrylic beads in five to seven years, so spec a siliconized acrylic or polyurethane rated ASTM C920 Class 25 or higher. South and west-facing windows take hard UV that bakes a bead brittle, so the same higher-movement sealant pays off there too.
One hard rule: never run pure silicone around a window you plan to paint. Paint will not stick to it. If a previous owner used clear silicone on the frame, cut it out and replace it with a paintable sealant before you prime.

Exterior siding, stucco gaps, and the SD-specific angles
Exterior caulking in San Diego County is a different animal than the rest of the country deals with, and it’s where most national painting blogs fall apart.
Coastal SD homes (Pacific Beach, Mission Beach, La Jolla, Encinitas, Solana Beach, Carlsbad, Oceanside) sit in a salt-laden marine layer that cycles between 60% and 95% relative humidity daily. That humidity swing is brutal on caulk. Standard acrylic latex caulks rated for 25-year cycles in dry climates fail in five to seven years on coastal SD trim. The fix is choosing a siliconized acrylic or a polyurethane caulk rated for ASTM C920 Class 25 movement or higher.
Inland SD (Escondido, Poway, Ramona, El Cajon, Santee, Lakeside) flips the problem. Summer surface temperatures on south-facing stucco hit 140-160°F during Santa Ana events. Winter morning temperatures drop to the low 40s. That 100°F daily swing makes stucco hairline cracks open and close measurably across the day. A rigid caulk fails fast. You want a Class 35 or Class 50 sealant rated for high movement.
For exterior siding gaps under 1/4 inch, experienced SD contractors spec a siliconized acrylic like Sherwin-Williams SherMax Urethanized Sealant or Dunn-Edwards EVERSHIELD for trim-to-stucco transitions. For stucco hairline cracks specifically, an elastomeric patch product is the right call, not a tube caulk. The depth and irregular profile of stucco cracks call for a trowel-applied material, not a bead. The full process is in our stucco crack repair before painting guide.
The sequence stays the same: pressure wash, let dry 48-72 hours (longer if you’re east of I-15 after a winter rain), prime any bare wood or fresh patch, caulk, then finish-coat. Cutting the dry time short is the single most common cause of premature caulk failure on SD coastal exteriors. Trapped moisture wicks through the bead and lifts it from the substrate within a season.
When to caulk before priming (the substrate exceptions)
There’s one scenario where you caulk before you prime: raw, unsealed gaps wide enough to swallow primer. Picture a 3/8-inch gap between a new door jamb and a stucco wall, or a crack running through stucco where the lath has separated. Priming first wastes product down the void, and the resulting bond is weak.
In those cases, the order is:
- Clear loose material and dust.
- Pack the gap with backer rod or foam fill so the caulk has a 3/8-inch maximum depth.
- Apply your sealant.
- Let it cure (24 hours minimum for polyurethane, 4-8 hours for siliconized acrylic).
- Prime the surrounding substrate plus the cured caulk surface.
- Finish-coat over everything.
The other exception: weep holes, ventilation gaps, and intentional drainage breaks in stucco and siding. Never caulk these. They exist to let trapped moisture escape. Sealing them traps water behind the wall, and you get rot, mold, or efflorescence within a year. If you’re not sure whether a gap is a weep or a defect, leave it alone and ask a painter or stucco contractor before sealing.
Decision table: caulk before or caulk after?
A quick reference for the common scenarios:
| Scenario | Caulk before primer | Caulk after primer | Caulk after finish coat |
|---|---|---|---|
| New interior baseboards | No | Yes | No |
| New interior trim and crown | No | Yes | No |
| Repainted interior trim with hairline gaps | No | Yes | Touch-up only |
| Exterior wood siding joints | No | Yes | No |
| Wide gaps (over 1/4 inch) | Yes | Re-caulk if needed | No |
| Stucco hairline cracks | Patch and prime first | Yes (elastomeric patch) | No |
| Stucco-to-trim transitions | No | Yes (polyurethane) | No |
| Weep holes and drainage gaps | Never | Never | Never |
| Visible seam discovered after final coat | No | No | Yes (matching paint) |
The pattern: prime first in almost every case. The only legitimate “caulk before primer” scenarios involve gaps too wide to prime cleanly.
Caulk types for San Diego conditions
Picking the wrong tube wastes your prep work. Here’s the SD-tested shortlist.
Paintable siliconized acrylic latex is the interior workhorse. It paints in 30-60 minutes, tools easily with a damp finger, and lasts 25+ years in conditioned interior space. Look for “paintable” on the label and an ASTM C834 rating. DAP Alex Plus, GE Paintable Silicone Supreme, and Sherwin-Williams 950A are common SD job-site picks. The DAP Alex tech data sheet lists the application temperature range and skin time you need.
Polyurethane sealant is the exterior coastal pick. It outlasts acrylic on south-facing siding and coastal trim by a factor of two to three. The tradeoff: harder to tool, longer cure (24-72 hours before paint), and tougher cleanup. Sika Sikaflex 1a and Sherwin-Williams SherMax are the SD coastal favorites. The ASTM C920 standard defines the movement classes (Class 12.5, 25, 35, 50) - choose 25 minimum for coastal exposure.
Pure silicone is for kitchens, baths, and tile-to-tub joints, not for painted surfaces. Paint will not adhere to it. The handful of “paintable silicone” products on the shelf are actually siliconized acrylics with a silicone additive. Read the label carefully.
Elastomeric patch is for stucco cracks, not joints. It’s a thicker, trowel-applied material like Quikrete Stucco Patch or Sherwin-Williams Loxon Concrete and Masonry Patch. Family Handyman’s stucco crack guide has clear photos of the right consistency.
Avoid the bargain caulks at $2 a tube. They’re chalky filler with a binder, they shrink heavily, and they pull away from the substrate inside a year. A quality paintable caulk runs $7-12 per tube and is the cheapest line item on any quality painting job.
When pros include caulking in the bid
Every quote from a contractor matched through Paint Pros San Diego bakes caulking into the prep line item, not as an add-on. If a contractor’s bid doesn’t mention caulking, ask why. Either they’re skipping it (and the job will look amateur within months) or they’re hiding it inside a vague “prep” charge with no scope. A professional bid lists the linear feet of caulking included, the caulk type, and the substrate prep steps. That’s how you compare apples to apples between three SD County painting estimates.
Caulking is also where the value of professional painters shows up most. The bead consistency, the tooling technique, and the substrate judgment (when to prime first, when to backer-rod a gap, when to pull old caulk and start over) take a few hundred jobs to develop. It’s the part of the prep work that looks easy on YouTube and bites DIY painters six months later when the lines crack.
FAQ
Q: Should you caulk before or after painting? A: Caulk after priming and before the first finish coat. That’s the universal pro sequence for new interior trim, baseboards, crown molding, and exterior siding gaps. Caulking only after the finish coats is for touch-ups, not new work.
Q: Do you caulk baseboards before or after painting? A: Caulk baseboards after priming the baseboard and the bottom inch of wall, before the finish coat. Priming first gives the caulk a stable substrate to bond to. Painting over the cured caulk hides the seam. See our baseboard caulking guide for the full sequence.
Q: Do you caulk trim before or after painting? A: Same answer as baseboards: prime first, caulk after, then finish coat. Door casings and window trim follow the same order. For crown molding with gaps wider than 1/8 inch, pack the gap with backer rod before caulking so the bead doesn’t crack as it cures.
Q: Do you caulk windows before or after painting? A: Before the finish coat. Interior window trim gets primed, caulked at the casing joints, then painted. Exterior window perimeters get caulked where the frame meets the stucco or siding, then painted so the coat seals the bead. Use a siliconized acrylic or polyurethane on coastal and south-facing windows, and never caulk a paintable window with pure silicone, since paint will not adhere to it.
Q: How long should caulk dry before painting in San Diego? A: Paintable siliconized acrylic caulks list 30 to 60 minutes to skin and accept paint. In SD’s marine-layer humidity, give it 2 hours to be safe. Polyurethane caulks need 24 to 72 hours before paint. Coastal homes (PB, La Jolla, Carlsbad, Oceanside) trend toward the longer end of every cure window because of overnight humidity.
Q: What caulk should I use for exterior stucco in San Diego? A: For stucco-to-trim joints, use a polyurethane sealant rated ASTM C920 Class 25 or higher. For hairline cracks in the stucco field itself, use an elastomeric patch material, not a tube caulk. Coastal homes benefit from Class 35 or 50 ratings to handle the daily humidity and temperature cycling.
Q: Can I caulk after the final coat of paint? A: Only for touch-ups. If you spot a shadow line or hairline gap after the finish coat, you can cut in a thin bead of paintable caulk, tool it flat, and touch-paint the line. For new work or full repaints, caulking after the finish coat looks unfinished because the bare caulk reads as a different sheen than the surrounding paint, even when both are technically the same color.
Q: Is it better to caulk or putty before painting? A: Caulk is for joints and gaps between two surfaces (trim to wall, baseboard to wall, siding to window). Putty (or wood filler) is for holes and surface defects in a single piece of material (nail holes, dents, dings in trim). Use both on the same job, in this order: putty first to fill holes, sand smooth, prime, then caulk joints, then paint. Mixing them up creates a wavy finish along your trim lines.
Q: How long should you wait between caulking and painting? A: Paintable acrylic caulks list 30 to 60 minutes of skin time before you can paint over them. In San Diego marine-layer humidity, wait 2 hours to be safe. Polyurethane sealants need 24 to 72 hours before paint. Painting before the bead has skinned causes wrinkles, fish-eyes, and adhesion failure as the caulk continues to off-gas under the wet paint film.
Q: What happens if you paint before caulking? A: The caulk bonds to the paint, not the substrate. Paint films are slick by design, so a bead applied over finish paint has nothing porous to grip. Within 6 to 18 months the bead releases at the edge and you see a visible shadow line. The only legitimate “caulk after painting” scenario is a small touch-up on a gap you missed, and even then the bead needs paint over it to lock down.
Q: Should you caulk all gaps before painting? A: No. Caulk gaps under 1/4 inch wide that don’t carry a structural or drainage function. Skip weep holes, intentional ventilation gaps in stucco and siding, expansion joints, and outside corner miters in crown molding. Sealing functional gaps traps moisture inside the wall and leads to rot, mold, or paint blistering. When in doubt, leave the gap alone and ask a contractor before sealing.
Q: Do you caulk drywall before painting? A: Not the field of the drywall. Caulk the transitions where drywall meets a different material: drywall to trim, drywall to baseboard, drywall to ceiling line, drywall to door casing. The drywall surface itself gets joint compound, sanding, and primer instead. Caulking a drywall seam over taped joint compound creates a bulge that telegraphs through the finish coat. For more on the prep sequence, see our interior painting San Diego guide.
Q: What is the best caulk for painting trim? A: A paintable siliconized acrylic latex with an ASTM C834 rating. DAP Alex Plus, GE Paintable Silicone Supreme, and Sherwin-Williams 950A are the most-used picks on San Diego job sites. They paint in 30 to 60 minutes, tool smooth with a damp finger, and last 25 years indoors. Avoid pure silicone (paint will not stick to it) and bargain $2 tubes (they shrink and crack within a year).
Get a free estimate
If you’re looking at gaps along baseboards, trim, or stucco and want them handled the right way, the contractors we match handle the full prep-prime-caulk-paint sequence. Call (858) 925-5546 for a free San Diego painting estimate. Paint Pros SD covers San Diego, Chula Vista, Carlsbad, Escondido, Oceanside, El Cajon, and the rest of SD County.